The Goal Zero Lighthouse Micro is one of the most-carried small lanterns in the US: USB-rechargeable, about the size of a pill bottle, bright enough for a tent or a two-person table. Out of the box it is a very good tool and a very plain object. This guide covers the accessories that actually change how it works at camp, which ones are worth money, and how to put a small light at the center of a table people want to sit at.
First, which Lighthouse Micro do you have?
Goal Zero has sold three lights under the Lighthouse Micro name, and accessories are not interchangeable between them.
- Lighthouse Micro: the original. Lantern only, no flashlight, no power output.
- Lighthouse Micro Flash: the same lantern body with a flashlight built into the top cap. This is the model most covers, including most SAKAKI Gear covers, are cut around.
- Lighthouse Micro Charge: a larger body with a USB output so it doubles as a small power bank. It does not fit any SAKAKI Gear cover.
If you are not sure which one is in your kit, the Lighthouse Micro cover compatibility guide shows how to tell them apart in a few seconds and lists exactly which cover fits which light. For the three lights side by side, with lumens, runtime, size and weight, see Lighthouse Micro vs Micro Flash vs Micro Charge.
The five accessory categories, ranked by how much they change
1. A cover or shade (the biggest change)
The stock Lighthouse Micro throws a cool, even light through a clear plastic lens. That is fine for finding a zipper and unflattering for a dinner table. A cover, which some shops call a lantern shade, does three things at once: it changes the color of the light, it hides the bare LED so nobody at the table is looking straight into it, and it gives the light a silhouette. A machined brass cover also adds weight low in the body, which keeps the lantern planted when someone bumps the table.
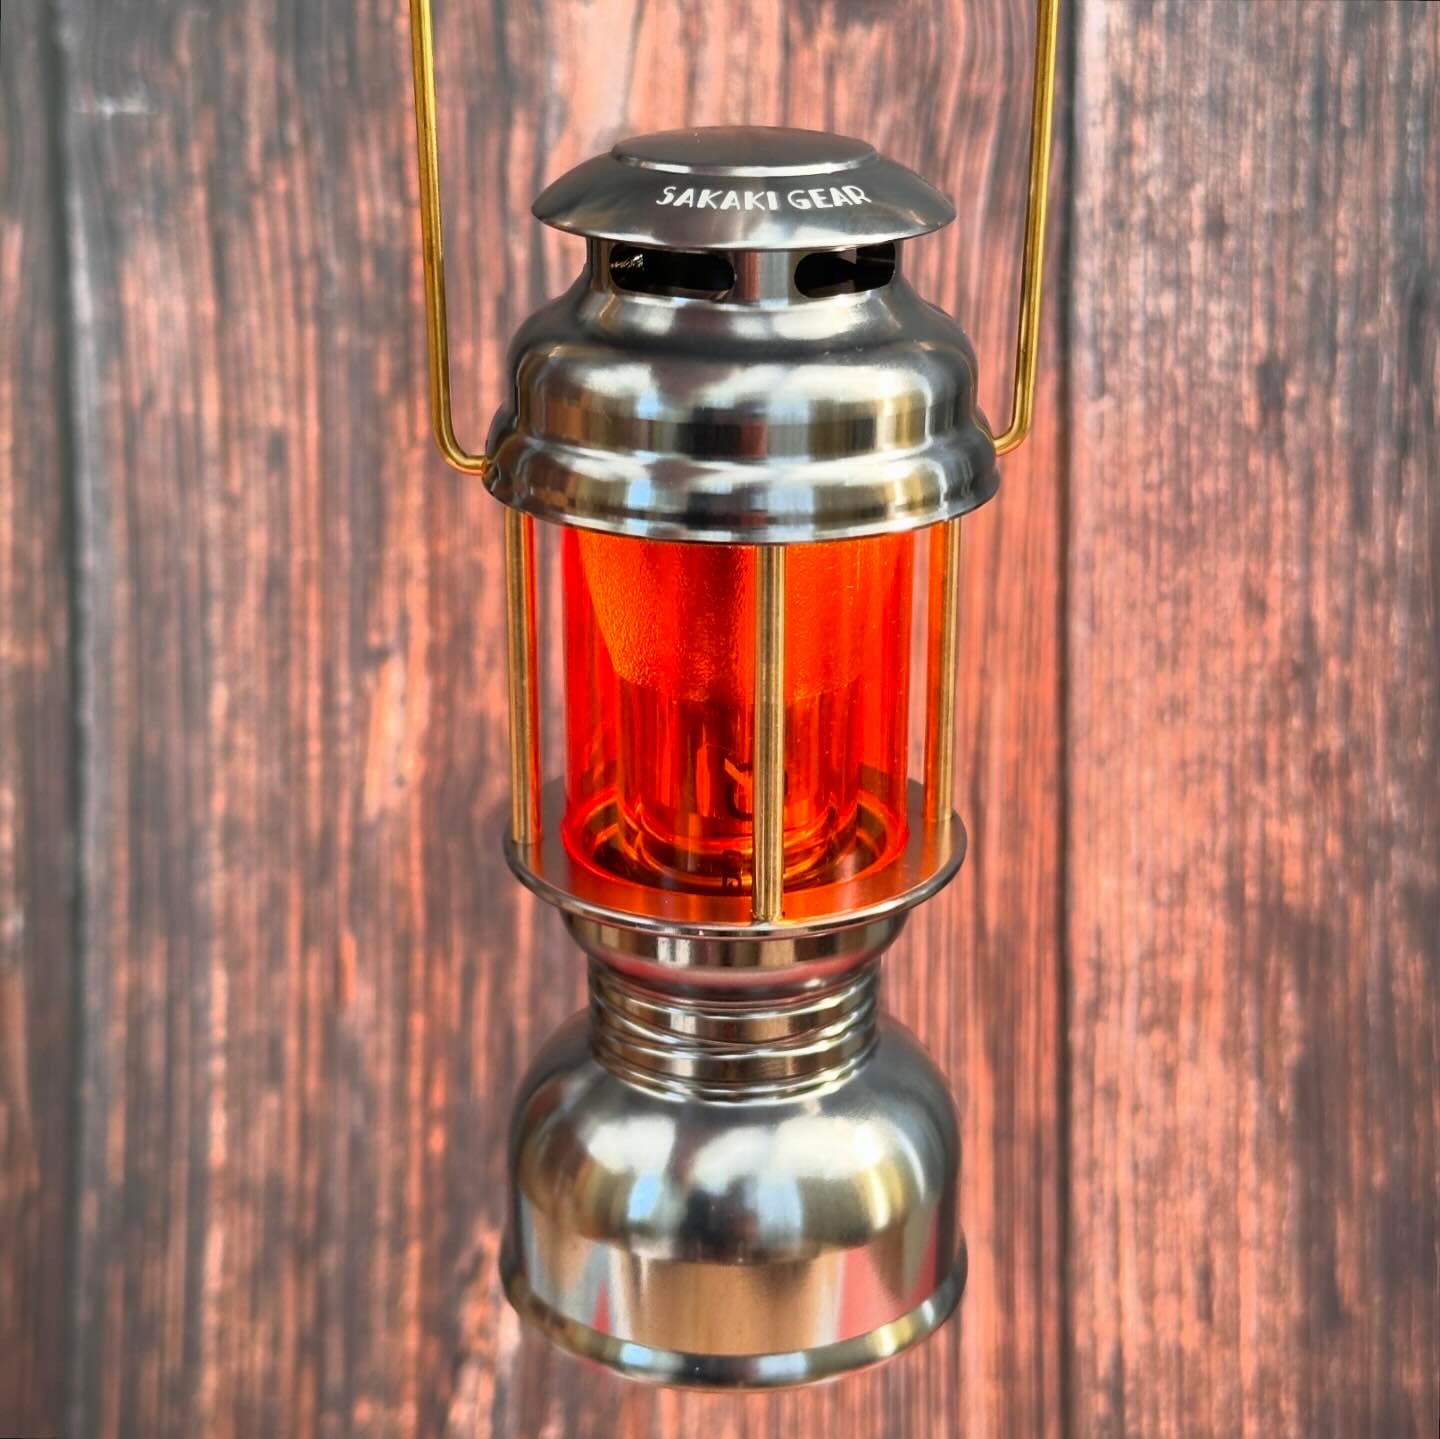
What to look for: a cover that leaves the power button reachable with the cover on (so you are not taking it apart to dim it), a warm-toned diffuser rather than a clear one, and a fit that is specific to your model rather than “universal”.
2. A hanger, hook, or loop
The Lighthouse Micro has a fold-out hanging loop, and for a tent ceiling that is all you need. For a tarp ridgeline or a tree branch, a short loop of paracord with a small carabiner is the accessory that gets used every trip and costs almost nothing. If you add a brass cover, the lantern will weigh several hundred grams, so hang it from something that will not sag: a ridgeline, a hook on a pole, not a tent’s inner mesh loop.
3. A base or a stand
The bare light is tall and narrow, which is why it tips over on uneven tables. Two fixes: a wide, heavy base, or a cover that puts the weight at the bottom. Most SAKAKI Gear covers are heavier at the bottom ring than at the cap, and the flat base sits on wood, stone, or a folding table without a stand. A small cork or leather coaster under it protects varnished tables and looks right with brass.
4. Power
The Micro and Micro Flash charge over USB and run for a full evening on low. The accessory that matters is simply a small power bank and a short cable in the same pouch as the lantern. Only the Micro Charge can give power out, and it is the one model that does not accept a cover, so decide which you value more before you buy the light.
5. Carry and protection
A brass cover will not break, but it will pick up scratches from tent stakes if it rides loose in a gear box. A soft pouch or a dedicated case keeps the finish clean. SAKAKI Gear covers ship in their own case for exactly this reason.
SAKAKI Gear covers compared
All of these are machined from solid metal in our own shop in Kasugai, Japan. The light itself is not included unless the product says so. Prices are in USD and include standard US shipping.
| Cover | Fits | Material | Size (assembled) | Weight | Price | Best for |
|---|---|---|---|---|---|---|
| Hajimari Set | Micro / Micro Flash (light installed) | Brass | 50 x 100 mm | approx. 300 g | $229 | First purchase, gift, no light yet |
| Akatsuki | Micro Flash only | Solid brass or anodized aluminum (4 finishes) | 50 x 120 mm | approx. 450 g (brass) | $329 | The signature piece, classic lantern silhouette |
| Hatenaki | Micro / Micro Flash | Solid brass | 75 x 105 mm | approx. 250 g | $389 | Widest, softest glow; the flagship |
| Mikasa | Micro Flash only | Solid brass | 60 x 120 mm | approx. 500 g | $459 | Collector-grade presence |
| Mahoroba | Micro Flash, or oil flame | Solid brass | see product page | approx. 500 g | $439 | LED by night, real flame when you want it |
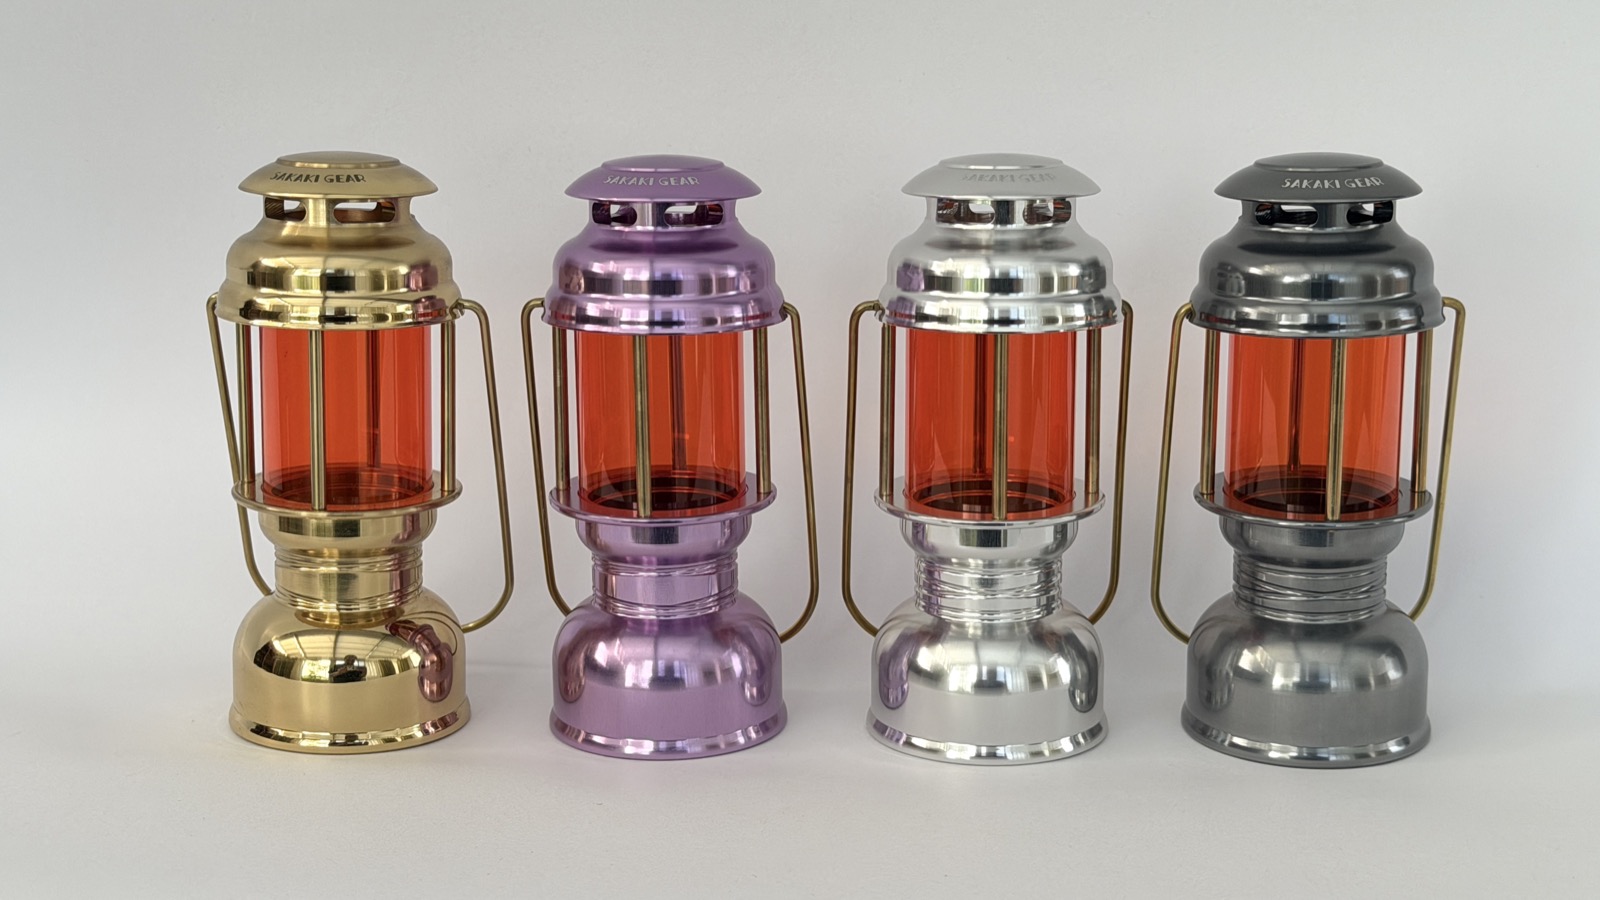
Not sure between brass and aluminum? Brass vs aluminum lantern covers explains weight, patina, and how each one ages.
Three setups that work
The dinner table
One lantern, in the middle, on low. Put it on a coaster so it sits a little higher than plates and cups. The cover should be one you can dim without removing, because the right brightness for cooking is wrong for eating. If two people are sitting across from each other, a cover with a diffuser (rather than a bare LED) is the difference between a table and an interrogation.
The tent entrance
Hang the light from the ridgeline just outside the door on a paracord loop, at head height when you are crouching. This is where the stock Micro is honestly fine, and where a heavy brass cover is least useful. If you own one lantern, it lives on the table at night and moves to the door only when you are packing up.
The photo table
If you photograph your setups, the lantern is the subject, not the light source. Use a second, plain light off to the side for exposure and let the brass lantern glow at its lowest setting. Wood, leather, and a dark tablecloth make brass read as brass; a white folding table makes everything look like plastic.

For more table ideas, see how to build an atmospheric Goal Zero lantern setup.
Living with brass
Brass is heavy and it changes. Fingerprints darken it within a few trips, and a year of use gives it an uneven, warm patina that most owners prefer to the day-one shine. If you want it bright again, a soft cloth and household brass polish bring it back in five minutes. Anodized aluminum does not patina and weighs less, which is the honest reason many first-time buyers pick gunmetal or silver. The care guide for machined metal camp gear covers cleaning, storage, and what not to use.
What to buy first
- You already own a Micro Flash: Akatsuki. It is the piece the brand was built on, and it fits your light with no guesswork.
- You own a standard Micro: Hatenaki, which fits both models.
- You own neither yet: the Hajimari Set arrives with the Goal Zero light already installed, so it is one box and one decision.
- You are buying a gift: the gift guide for Goal Zero lantern owners matches covers to the kind of camper you are buying for.
Every SAKAKI Gear piece starts as a solid billet on the same CNC lathes we use for industrial parts. If you want to see how a cover is made and checked before it ships, read Craft & Safety. Buying from Japan for the first time? Buying Japanese camp gear from the US walks through shipping, duties, and what arrives at your door.